Home Tips: The Best Cost Effective Home Security Systems

When it comes to your home, keeping your family and your abode protected is a top priority. With so many options available on the market these days, it helps to know the difference. Whether you’re seeking something budget-friendly or prefer all the bells and whistles, there is a security system that is right for you. We’re sharing some of the best on the market that you can set up on your own. Keep your home secure with our list of the best cost-effective home security systems.

SimpliSafe

Simplisafe | Home Security Systems

While SimpliSafe is on the pricier side of cost-effective systems, it is still simply a great deal. If you are seeking a system without extra add-ons, look no further. With SimpliSafe, there are no installation costs or monthly fees. Are you worried about contracts? There isn’t one. This is a system that gets right to guarding your home and skips all of the extra costs and frills.

Monthly Plan Price: $14.99 p/mo.

Full Kit Set-up Price: starting at $229

Smart Home Capability: Amazon Alexa, Google Assistant

Ring

Ring | Home Security Systems

The Ring system is an automatic go-to, and with most households having an Alexa device, it makes sense as a top choice. What is excellent about the Ring security system is its cheap monthly monitoring cost and 60-day cloud storage. Not to mention, with Amazon’s friendly warranty and return policy, it’s as easy to get product assistance as it is to ask Alexa what the weather is today.

Monthly Plan Price: $10.00 p/mo.

Full Kit Set-up Price: starting at $199.99

Smart Home Capability: Amazon Alexa, Z Wave

Kangaroo

Kangaroo | Home Security Systems

Kangaroo jumps right onto the list of cost-effective home security systems as the cheapest on the block. But affordable does not mean less secure in this instance. The monthly monitoring fee clocks in at the same rate as Ring, and it does the job well. The Kangaroo system is an innovative choice for those looking for a simple package option. 

Monthly Plan Price: $10.00 p/mo.

Full Kit Set-up Price: starting at $79.00

Smart Home Capability: Amazon Alexa, Google Assistant

Wyze Cam Pan

Wyze Cam | Home Security Systems

If you prefer to simplify your monitoring system even further, the Wyze Cam may be your best bet. This single-camera option remains effective with a free mobile app and custom alerts. Did we mention they also provide 14 days of free cloud storage? 

Monthly Plan Price: n/a

Full Kit Set-up Price: starting at $37.98

Smart Home Capability: Amazon Alexa, Google Assistant

Abode

abode

Abode made the smart move in upping its innovative home capabilities, and what’s not to love about that? This is the only security system on the market that can connect to Alexa, Apple Hoemkit, Google Assistant, Z-Wave, and Zigbee. So basically, almost every smart home system that there is. 

Monthly Plan Price: $20.00 p/mo.

Full Kit Set-up Price: starting at $199.00

Smart Home Capability: Amazon Alexa, Apple Homekit, Google Assistant, Z-Wave, Zibbee

Cove

Cove

Not only is Cove considered one of the best cost-effective home security systems, they dont skimp on features for their budget pricing. All you have to pay for is the wireless equipment and choose your plan (both are affordable), and you are ready to go. With no contract, the only long-term deal you’ll have is the peace of mind that will come from securing your home. 

Monthly Plan Price: $14.99 p/mo.

Full Kit Set-up Price: starting at $150.00+

Smart Home Capability: Amazon Alexa, Google Assistant

Brinks

Brinks

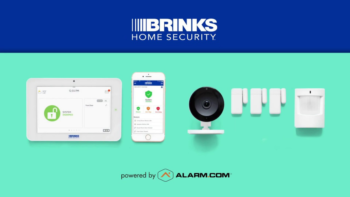
When it comes to security systems, Brinks has been a long-term go-to for households and the world throughout the years. That’s why it should come as no surprise that while they have been around, their system is certainly not outdated. Brinks offers homeowners a reliable, high-quality system with a competitively priced live monitoring tool and built-in home automation.

Monthly Plan Price: $39.00 p/mo.

Full Kit Set-up Price: starting at $199.00 (+$19.00 activation fee)

Smart Home Capability: Amazon Alexa, Z-Wave

A Rodeo Guide to Moving and Packing

Moving can be stressful. From sorting through what stays and what goes to purchasing a heap of supplies, it’s a journey. Literally. But it does not always have to be. At Rodeo Realty we pride ourselves on making your home experience as seamless as possible. Thats why we’ve narrowed down your moving and packing essential tips! Read below for a helpful handful of moving tricks and click the link at the bottom for your moving checklist!

1. Don’t hesitate on ordering a-lot of boxes…because you never know

It is better safe then sorry! Rather then get the bare minimum and have to last minute track down more boxes, bulk up on extra boxes. It will save you that extra time you can use towards a well deserved glass of wine after all the packing is finished.

2. Pack in all sizes

When picking out boxes, it is better to get a variety of sizes. You are likely to need more small and medium boxes rather then a heap of large ones. Grab a few wardrobe boxes, many medium and certainly a lot of small boxes.

3. Don’t forget the other moving supplies

Sure you’re all set on boxes but make sure you have enough tape to close them securely! More then what you think you will need is better then not enough. Make sure you grab packing paper and everything else you will need to ensure your items are packed safely and securely.

4. Keep your fragile items safe

Group delicate items together and make sure they are labeled as fragile so your movers know which boxes need extra care and a secure space in the van.

5. Paper packing

When packing you delicate items, avoid using newspaper as it can stain and smear. Instead go for the real deal and pick up packing paper to save yourself the ink scrub down on your fine china.

6. Bundle Breakables

As you pack your dishes, put packing paper around each one, then wrap bundles of five or six together with more paper. Pack dishes on their sides and never flat. Make sure to use plenty of bunched-up paper as padding above and below. Cups and bowls can be placed inside one another with paper between and rapped three or four in a bundle.

7. Consider other items that will need special treatment

Plasma TVs require special wooden crates for shipping if you don’t have the original box and can be ruined if you lay them flat. If packing yourself, double box your tv, setting the box containing the tv into another box that you’ve padded with packing paper.

8. Label your boxes

This is an easy but often overlooked step. Label each box so you know whats in it and in what room it goes. This will make the unpacking process a breeze.

9. Ditch the heavy load!

The heavier the item, the smaller the  box should be! It is much easier to carry heavier items when they’re in smaller boxes. Save the larger boxes for things that are lighter but hard to carry on their own. And of course never over pack a box!

10. No packing on moving day!

Take on the busy day with ease by making sure all your boxes are packed already. It is less stress ! This includes removed pictures from the walls beforehand.

11. Put heaver items on the bottom of boxes add lighter items on top.

If you are loading the truck yourself, it is better to have your boxes properly proportioned. Another tip is to pack heavier boxes first and toward the front of the truck for balance.

12. Don’t leave empty spaces

Fill in the gaps with clothing , towels, or packing paper. Movers often wont move boxes they feel are loosely packed.

Packing with movers?

We have you covered here too!

1. Last in, First Out

Tell your movers which boxes you need first at your new home and they will load the moving truck accordingly.

2. Keep your most important things with you

Don’t pack  jewelry or medication–keep these with you. You might need to access them on moving day and its nice for the movers if they know they don’t need to worry about keeping track of these small items.

3. Sort out the details ahead of time

Make sure you know where you movers can park. This is LA and we know how parking is. Visit the parking enforcement page head of your move in case you need to obtain a permit.

4. Prep your furniture

Remove all heavy and breakable items from dressers and desks so they are easier to lift.

5. Moving fine art?

Ask your movers about special crating for you prized positions. Never wrap an oil painting in regular paper. For pictures that are framed behind glass, make an X with masking tape across the glass to strengthen it and hold it together if it shatters.


Need a checklist to get you through the big day? Click here for Rodeo Realty’s Moving Checklist and check those moving jitters off your list!


4 Ways to Compost

With spring not too far off, it is the perfect time to start some new at-home routines. With California leading the way in green initiatives, we’ve rounded up four simple composting tricks. These techniques will help you reduce waste and aide the environment. The bonus is with these DIY tips you don’t even need a yard to get started!

Composting is a great way to not only reduce how much you’re throwing in the garbage, but it can also keep your trash smell at bay, thanks to having less organic material in that bin. Not to mention how much your plants will love it; if you don’t have a full garden, your houseplants will be happy about it, too. Even city dwellers or anyone without a yard can do it—really!

Before you get started, think about the type of composting you want to do. Cold composting is easier: You simply take organic materials you’d normally throw away —coffee grounds, eggshells, fruit, and vegetable peels—and put them in a composting pile or bin (just don’t add meats, dairy, or fats). Over about a year, the materials will decompose. Hot composting is more complicated, and uses nitrogen and carbon-containing ingredients to speed up the process. Another option is vermicomposting, which is when you use special worms to help the process along.

Don’t let the fact that you don’t have much space hold you back from composting. With a little ingenuity, a proper compost bin can be created just about anywhere.

1. Make your own outdoor compost bin. 

If you’ve got a spare trash can and a drill, you can turn that can into a composting can. You can also build your ownwith welded wire mesh, concrete blocks, or wooden pallets, and you can hide basically any bin behind a simple lattice fence. If you’ve got an outdoor bin, you can also throw in dry leaves, wood bark chips, and grass and plant clippings while you’re taking care of your yard. Make sure to water and stir your pile thoroughly.

2. Make your own indoor compost bin. 

Much like how you hide your trash can in a pull-out cabinet or under your sink, you can hide a compost bin right in your own kitchen, too. Again, you’ll need a drill: Use it to drill holes in the bottom of a metal container with a lid, then place the container into a shallow tray with sides. Give this indoor bin a base layer of a little dirt, and top your food scraps with some damp shredded newspapers (the newspapers will help control smell!). Make sure to stir it every week or so, and keep it covered.

3. Make a worm bin system. 

If you’re composting indoors and still worried about odors, vermicomposting is a great idea. You can’t just use any worms—you’ll need to purchase redworms online or at a garden supplier (about one pound per square foot in your bin). A vermicompost bin should also be kept in a cool, dark place. Start with a base of shredded newspaper or leaves mixed with soil, and get it damp, then add your worms and your food scraps. Vermicomposting is also a great option for beginners—if things get messed up, just dump out your bin outside and start over.

4. Check for community composting. 

If you aren’t into making your own compost, or don’t have the space for it, check to see if your community has its own group composting area where you can drop off food waste. Your city hall might have details, or you can ask your neighbors or post your query on a community directory, like Nextdoor. Your community may even provide biodegradable bags to hold your scraps in between your visits to their composting center.

Your compost is ready when it’s not giving off any heat, and it’s become dry, brown, and crumbly. Use it to feed your garden or potted plants, and watch your plants live their best lives!

Courtesy of: Better Homes & Gardens