Home Tips: 8 Ways To Elevate Your Thanksgiving Tablescape

What makes a Thanksgiving table memorable to the guests? At first you may think it would be the turkey or other holiday fixings. However, it really is in the atmosphere you create. A traditional Thanksgiving consists of the standard foods: turkey, mashed potatoes, cranberry sauce, ect. You have a similar meal year to year. To make it a memorable one, elevate your tablescape and create a unique experience for your guests. Thanksgiving doesn’t have to be a formal affair, with each plate flanked by a platoon of flatware. Instead, your table can highlight your personal style. Choose colors, textures, and patterns to set the scene in a welcoming homecoming for your loved ones.

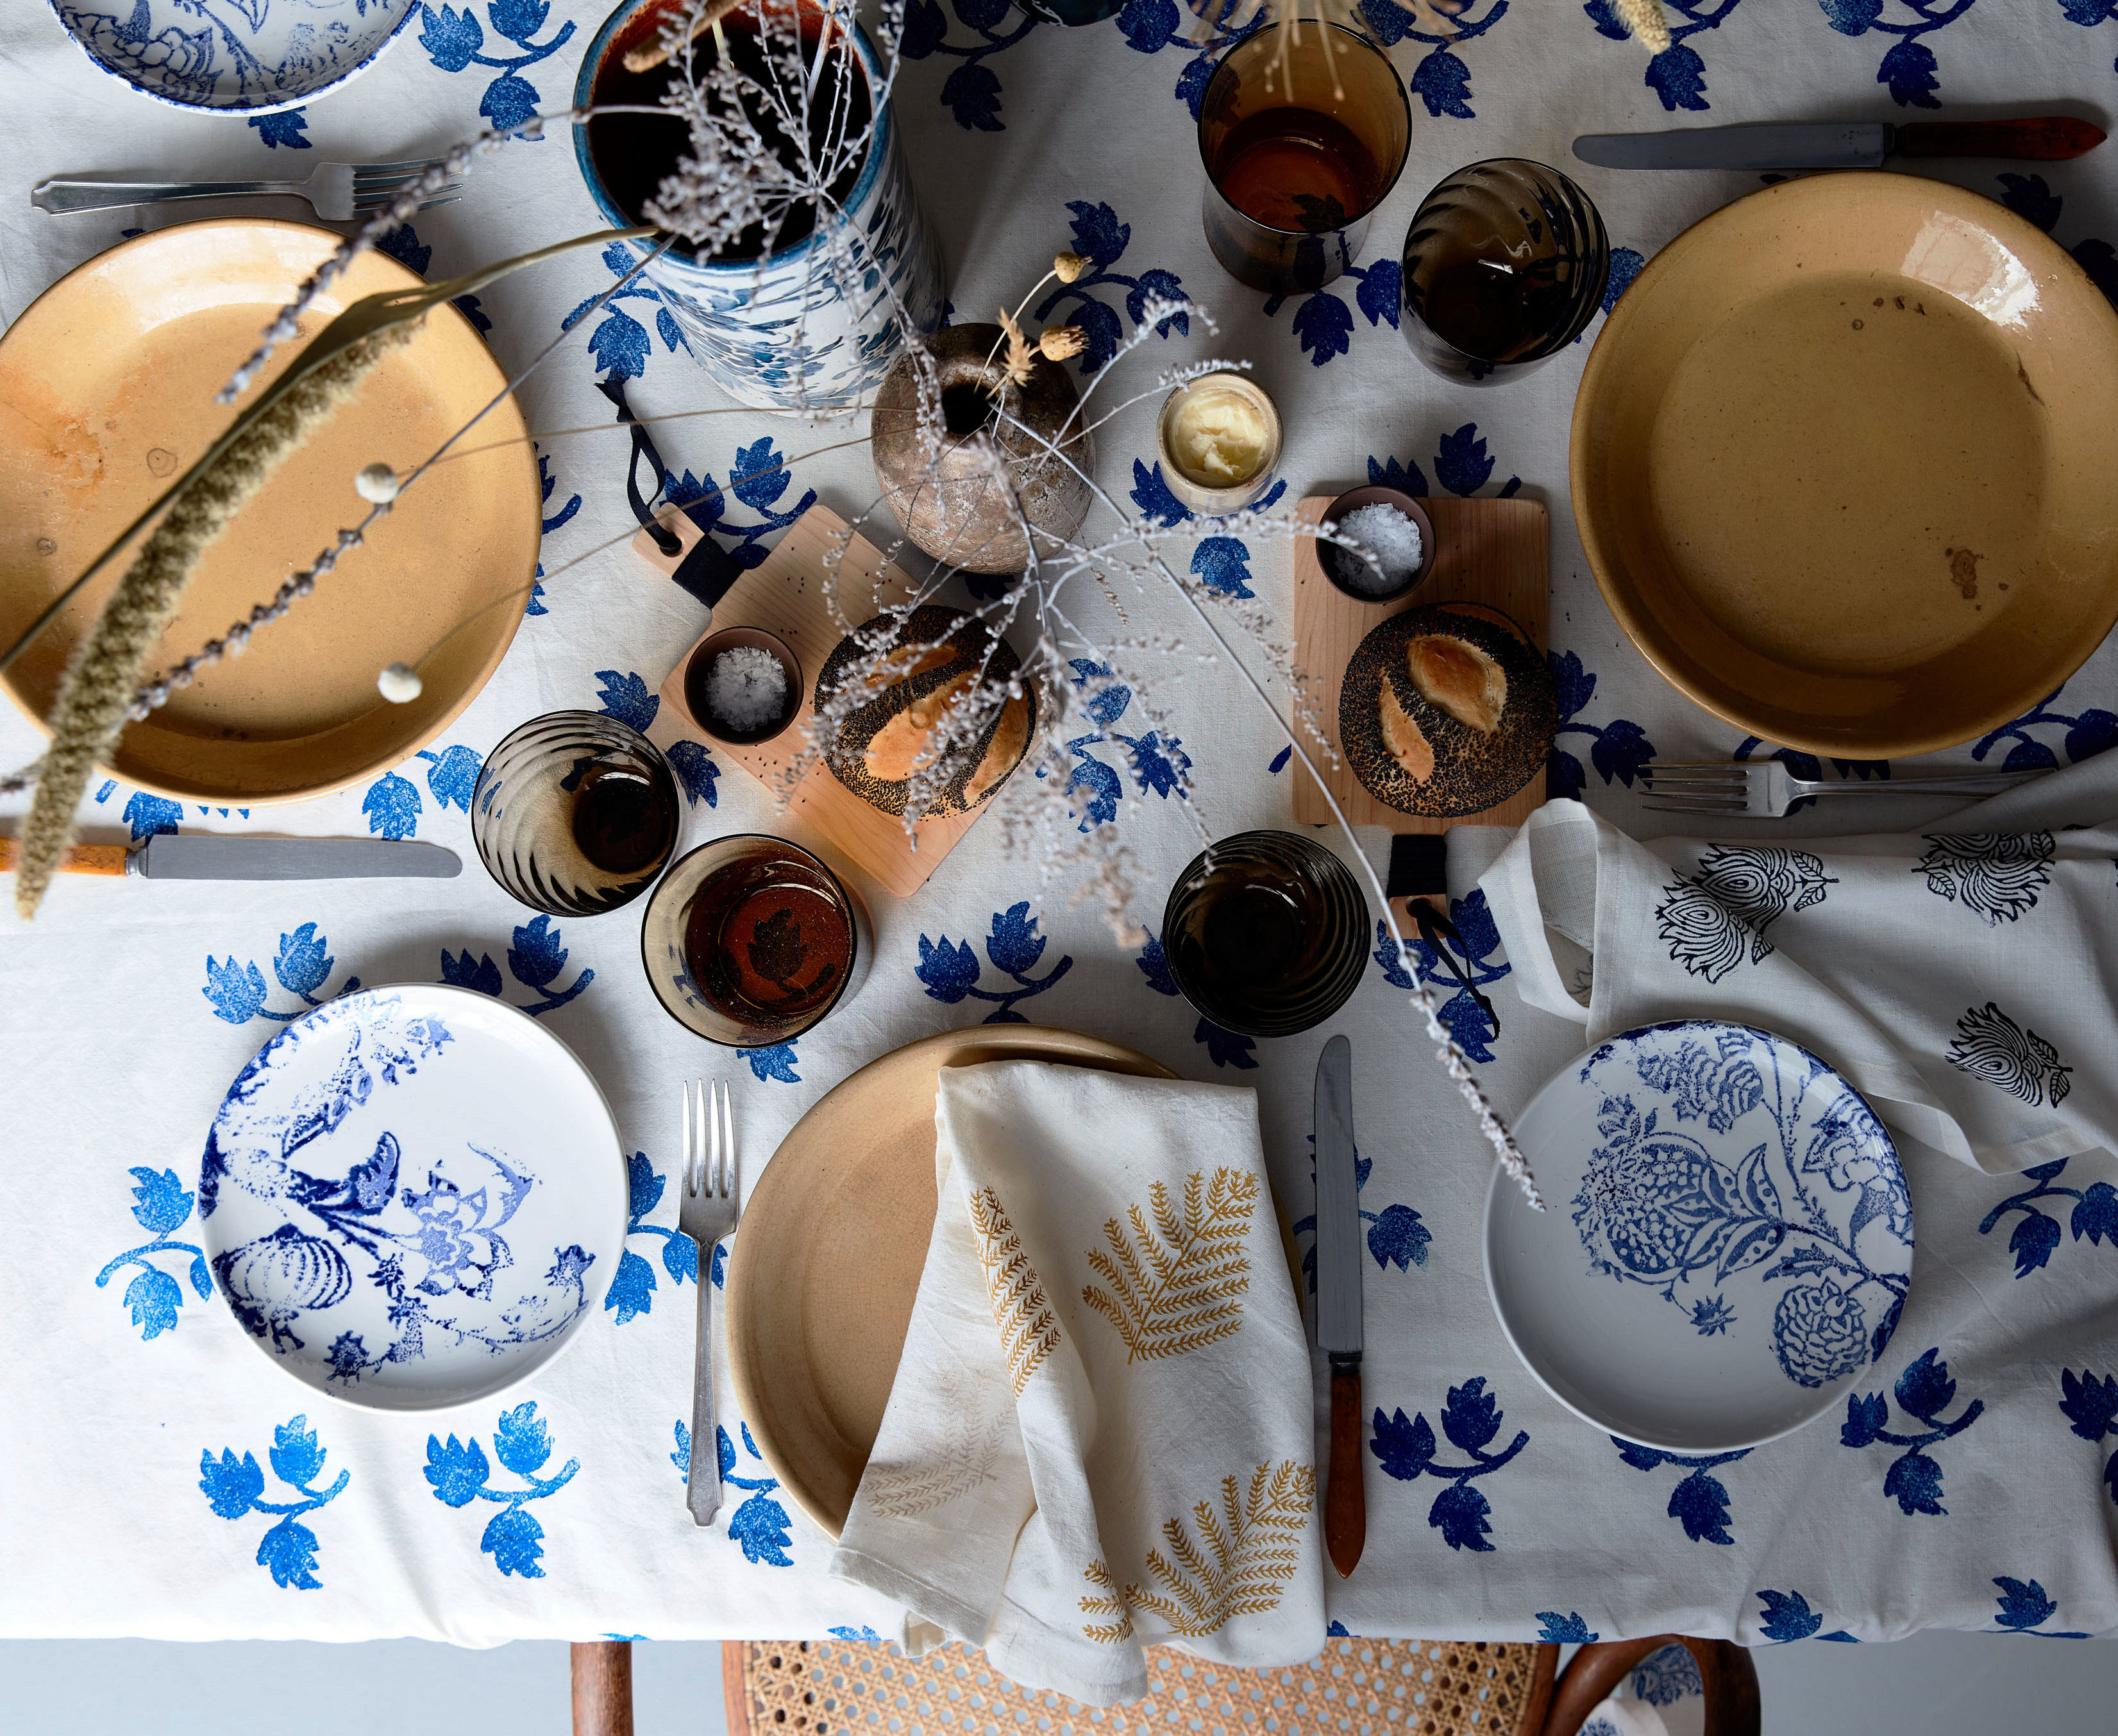
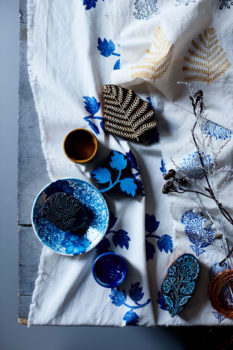
Indigo Table Setting

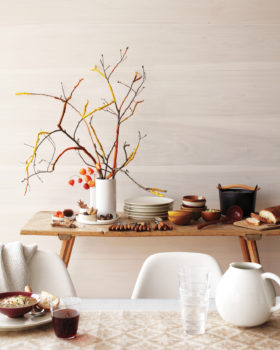
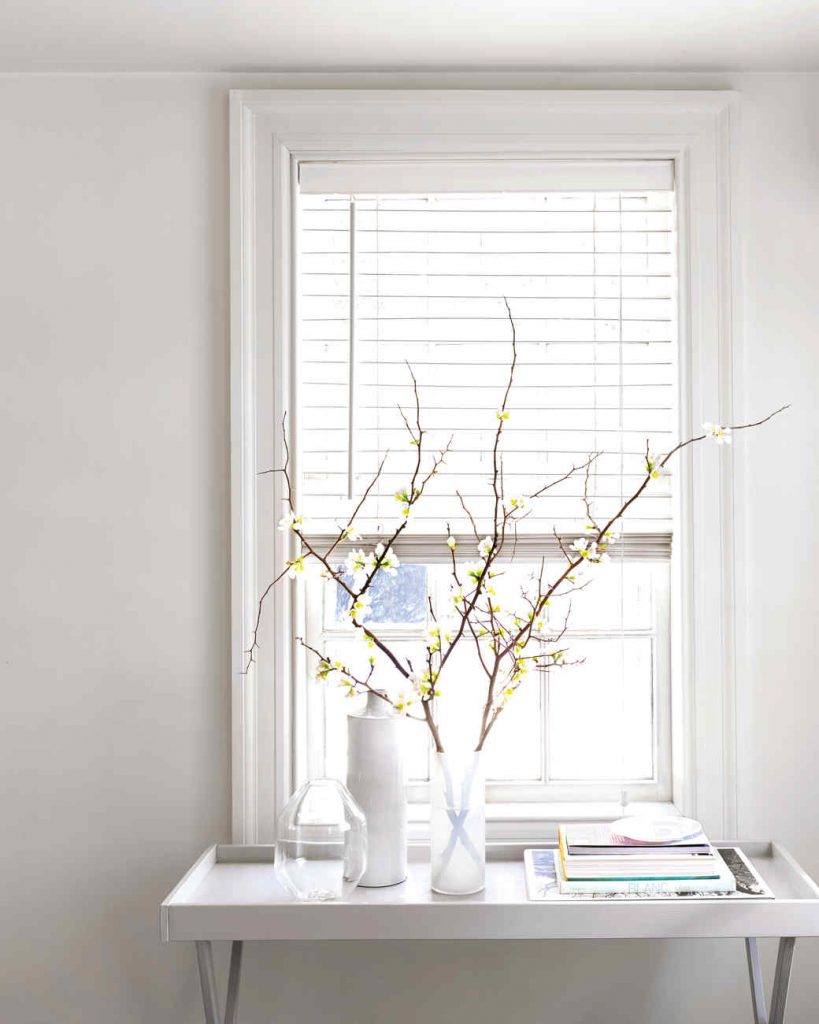
Take a break from fussing with formal floral centerpieces and display wispy dried branch stalks in different vases instead. For a snow-kissed look, lay them on paper and spray them with white floral paint before arranging. Block-printed linens are costly to buy but surprisingly simple to make using little more than textile paint, muslin fabric, and woodblock stamps.

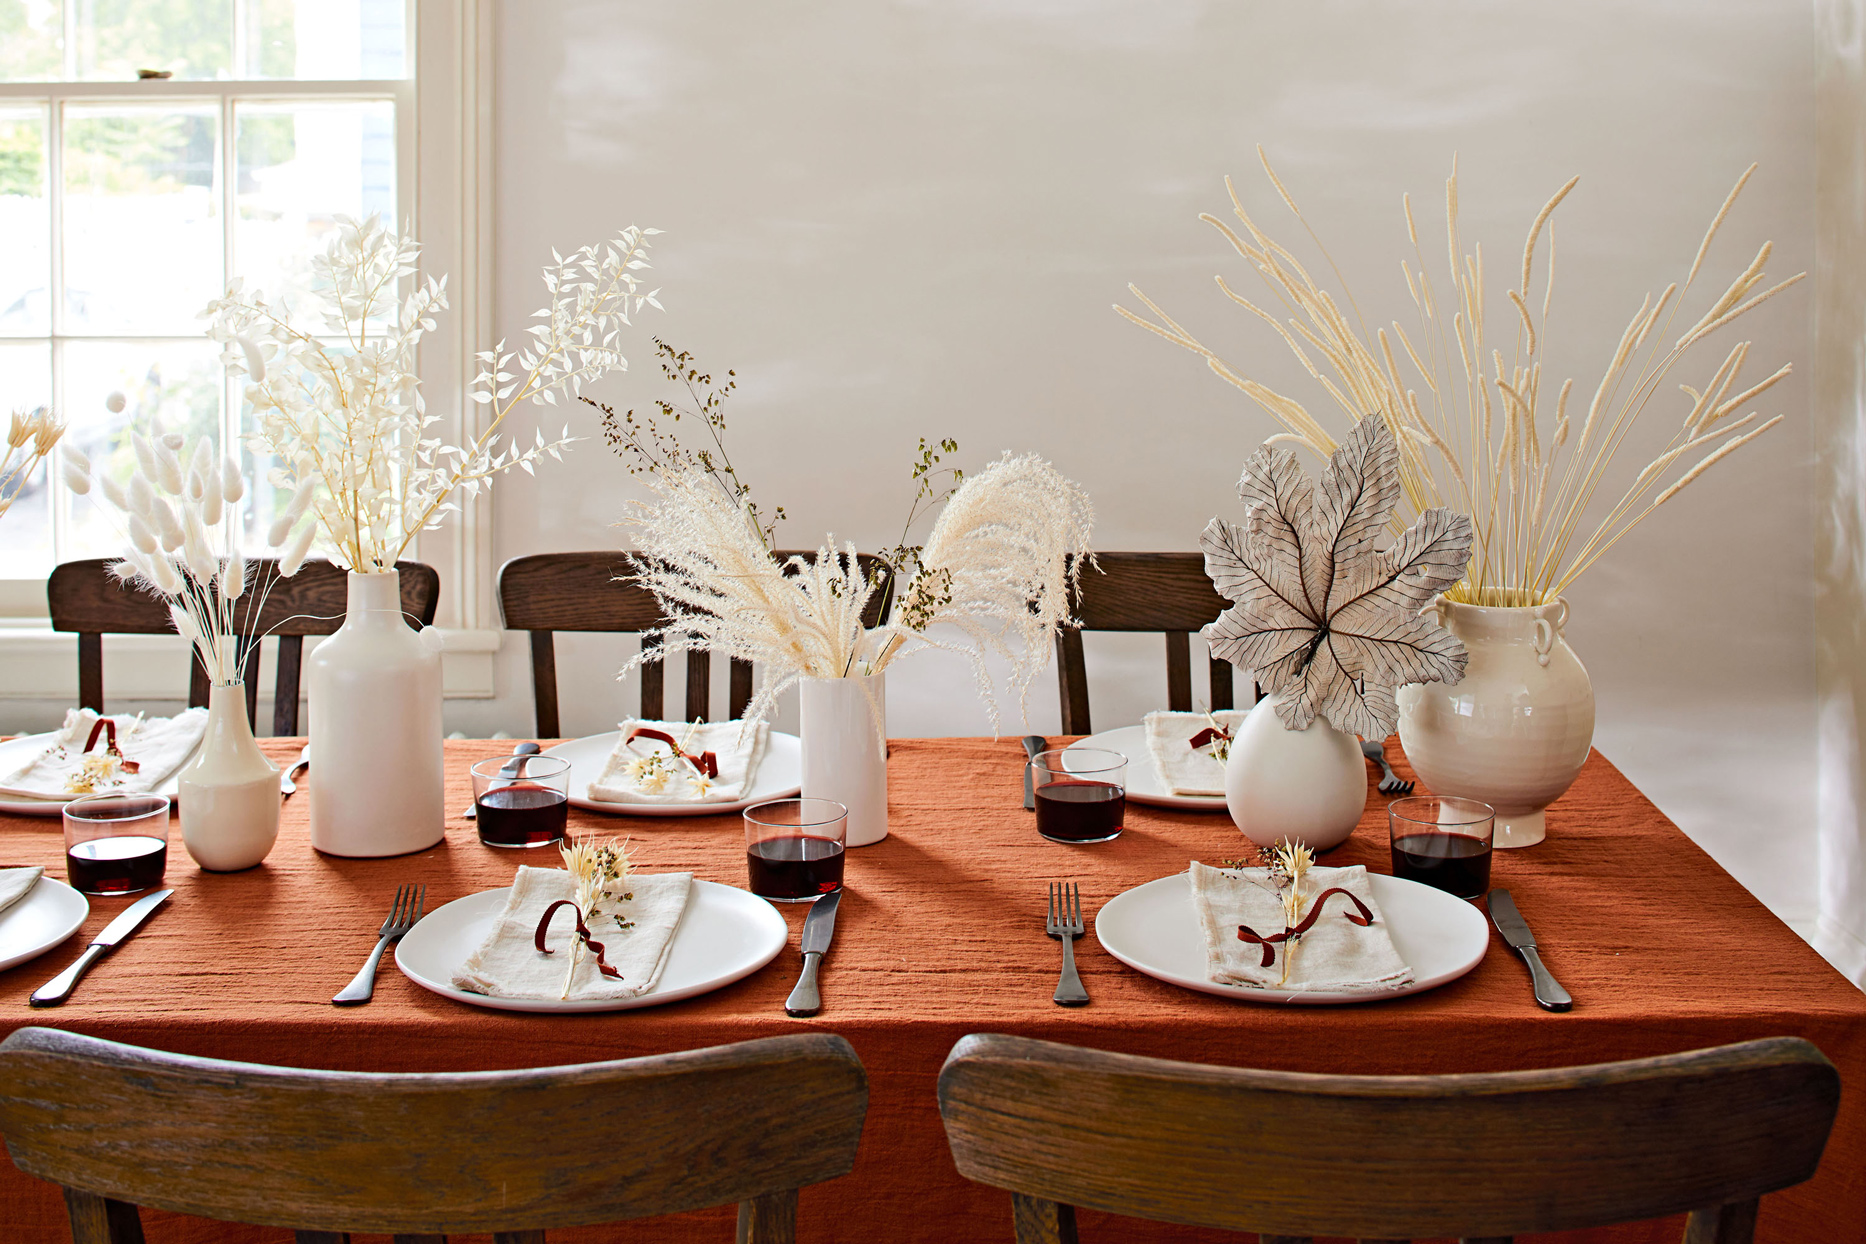
Dried Flowers Table Setting

The key to keeping your Dried Table Setting breezy yet modern is to stick mostly to one variety per vase (the mashup of white stoneware also stands out nicely on a rust tablecloth), and line them up loosely. The spare palette will work all winter; for a change of scenery, just swap out the vessels.

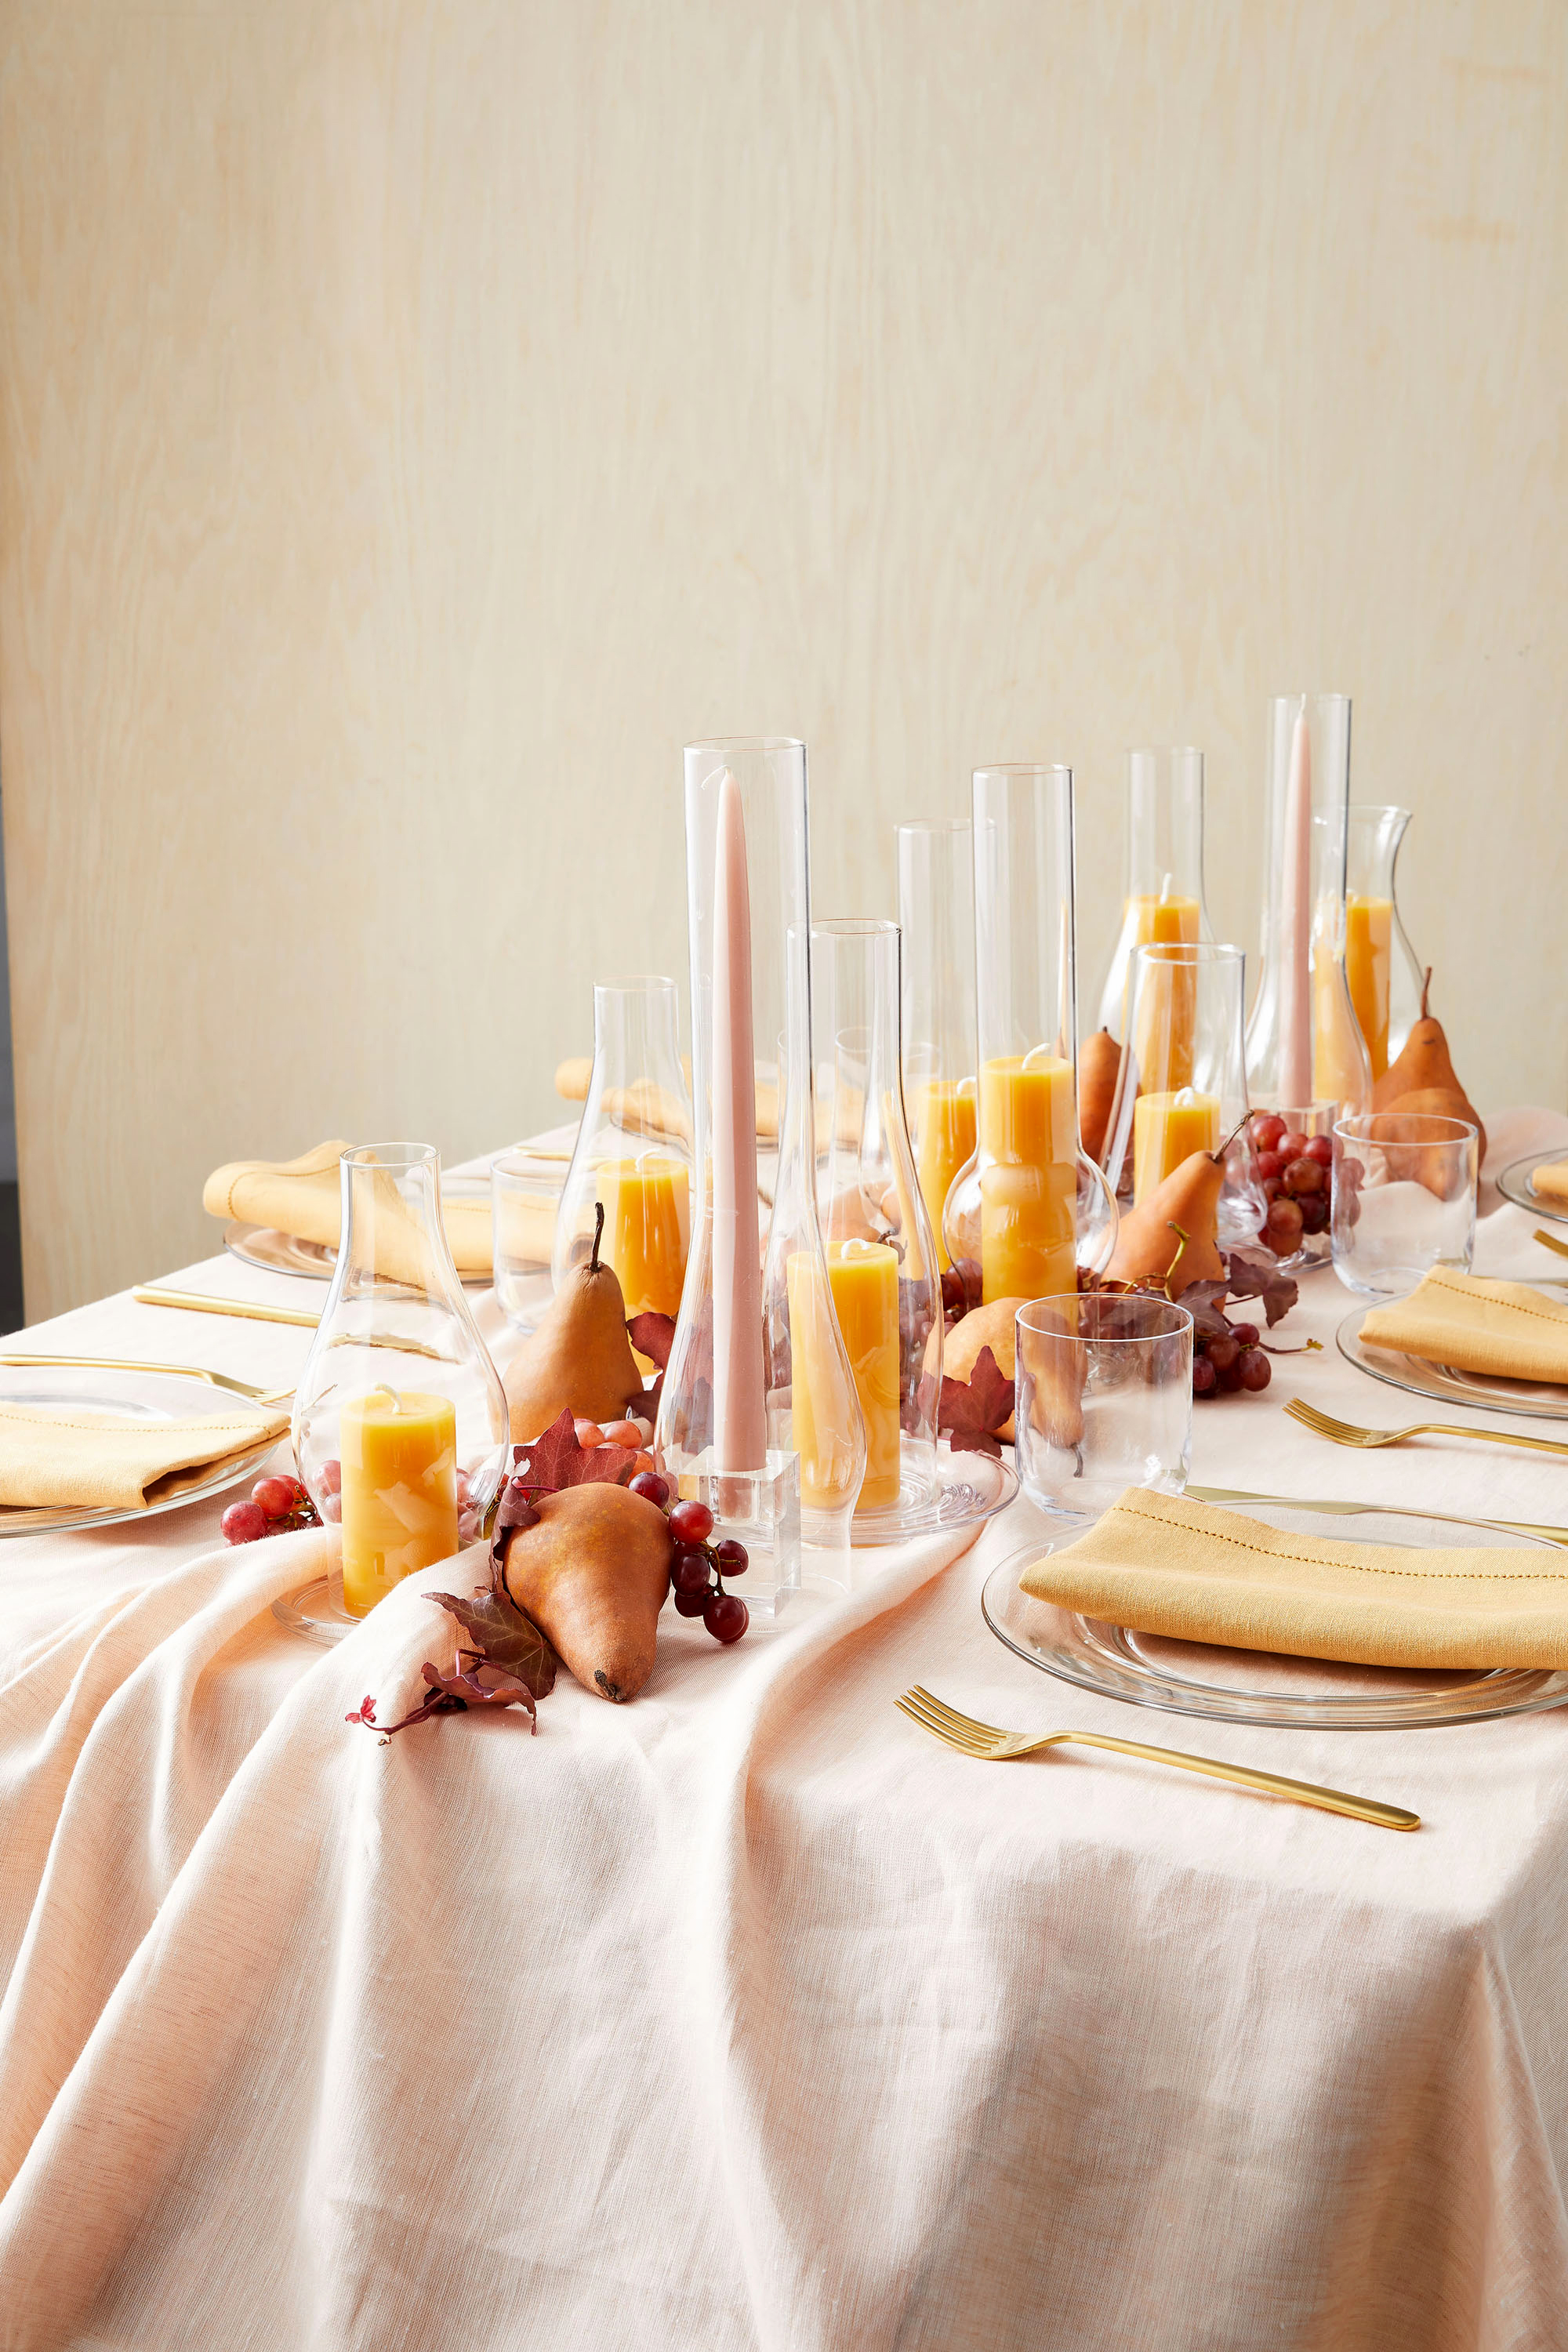
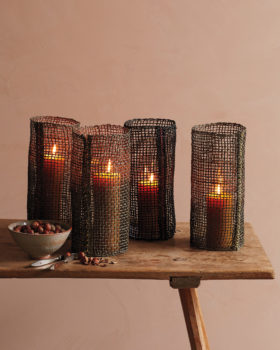
Fall Harvest Table Setting

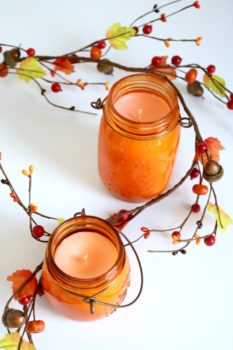
This is debatably the easiest and most eye-catching, wilt-proof centerpiece. Simply place candles on small glass dishes, and cover them with curvy lamp chimneys (which you can find for dollars at hardware or antiques stores). Fill in spare spaces with fruit and foliage. When guests arrive, light the wicks and bask in the glow.

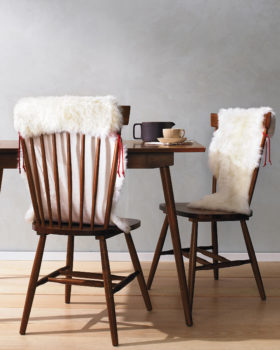
Cozy Rustic Table Setting

Feelings of gratitude come naturally in autumn, peak season for ethereal light, rich colors, and happy homecomings. This Thanksgiving, play up those elements with a simple yet special table that celebrates great food and close-knit company. Pull up a cushioned bench to a spread of easy earthly delights.

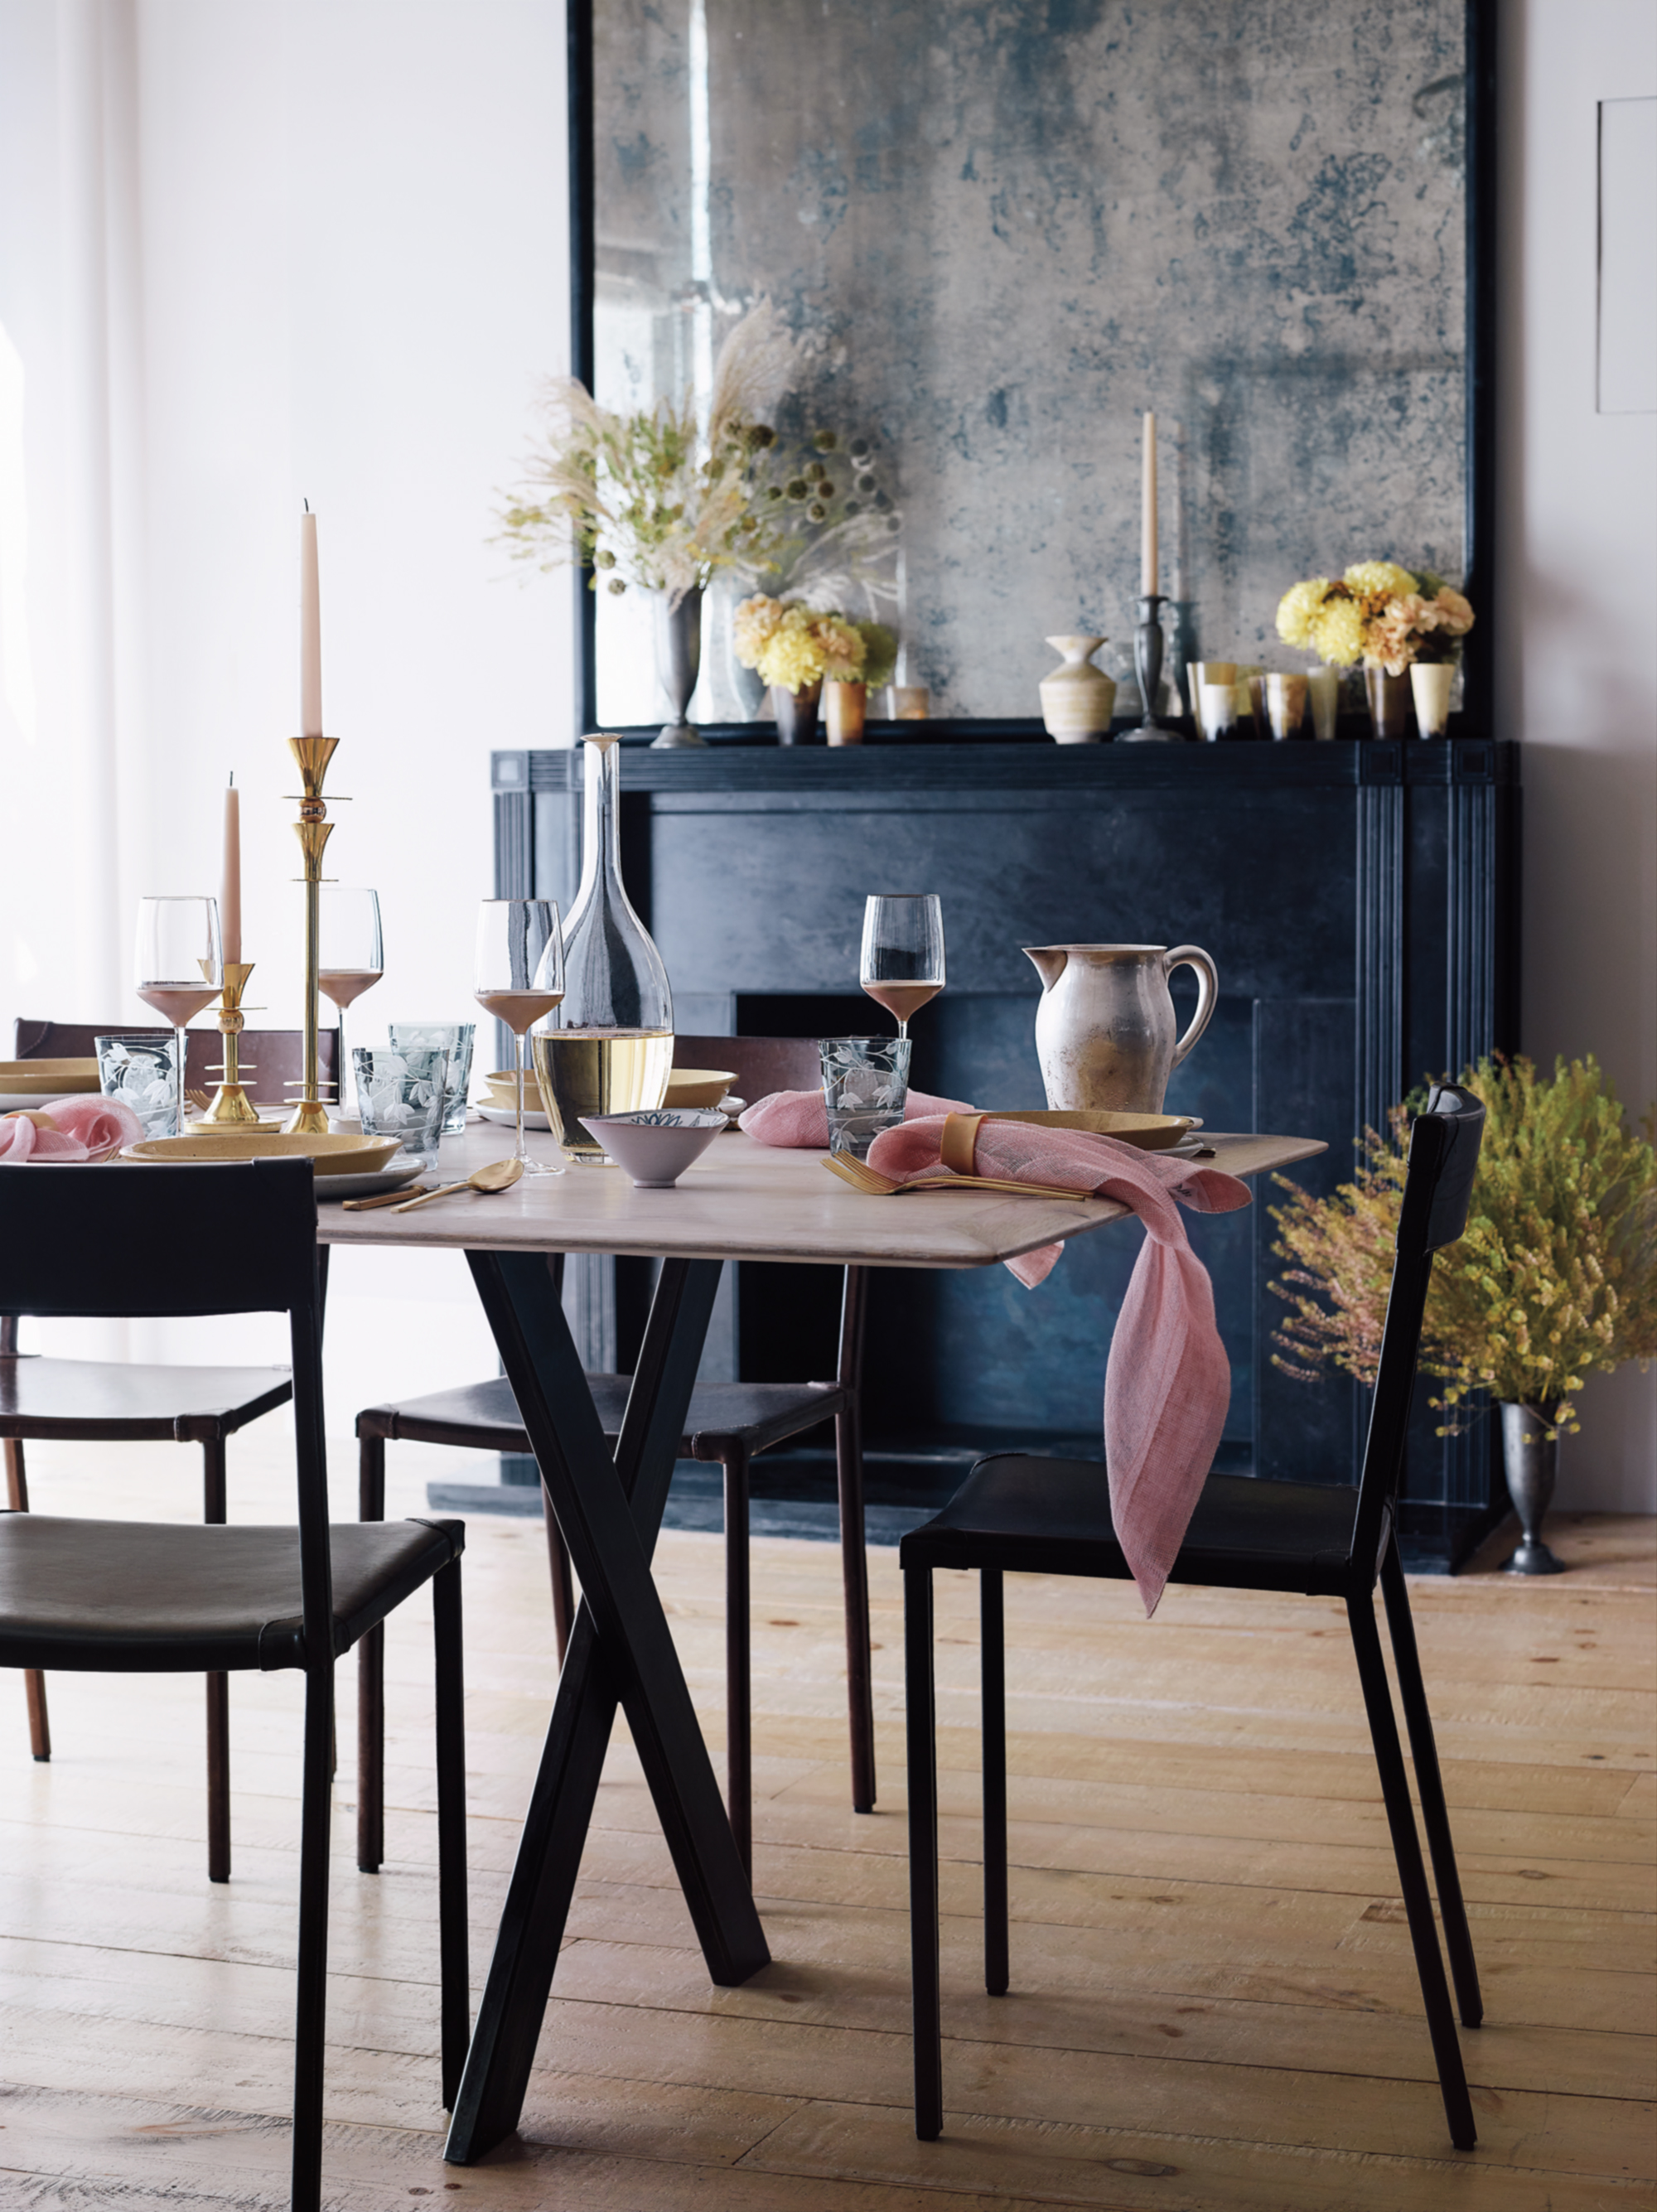
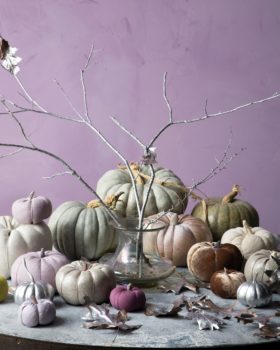
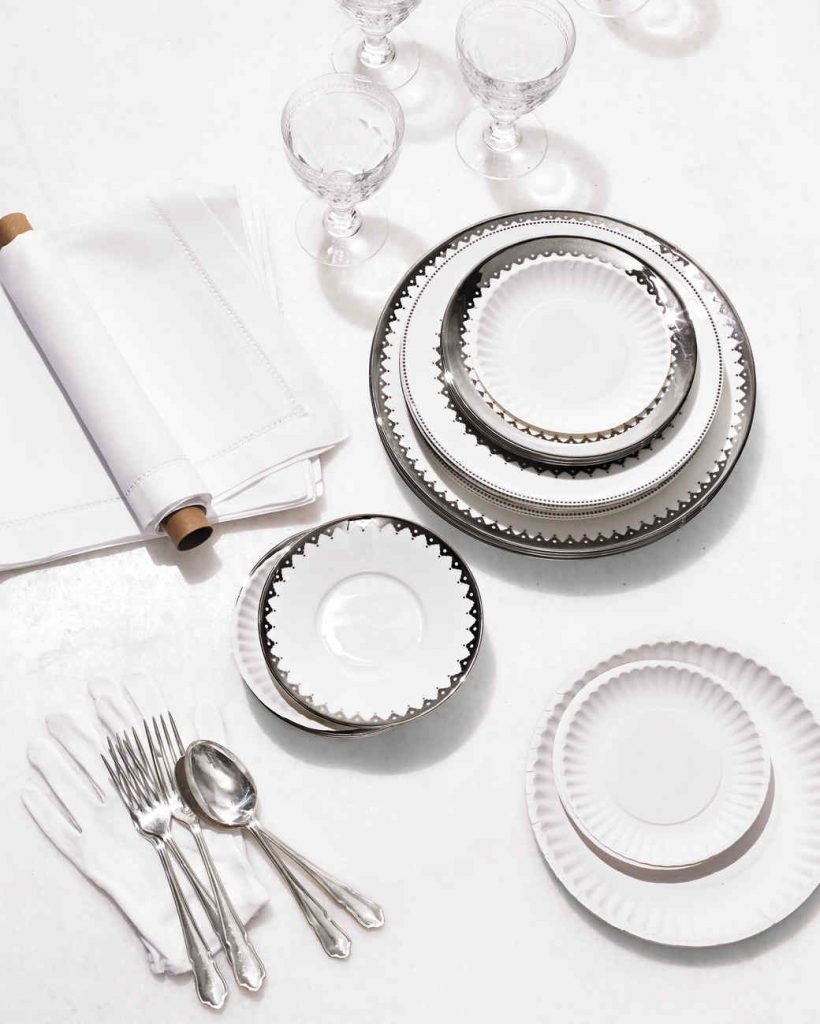
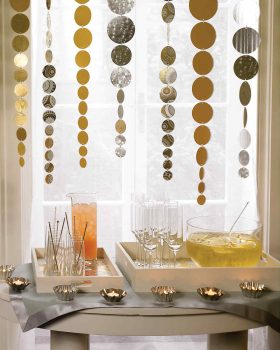
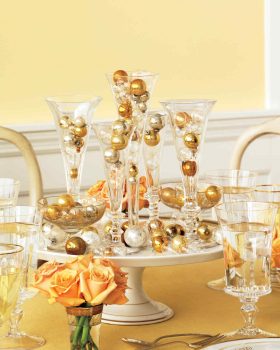
Soft Metallics Table Setting

In this Soft Metallics setting, glints of gold and silver play off of soft pink and yellow colors throughout . Positioned on and around the mantel, arrangements of carnations, mums, scabiosa seed heads, and grasses bring natural beauty to the setting. Especially… without crowding the table.

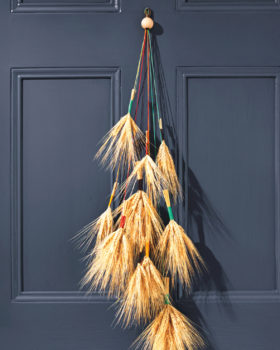
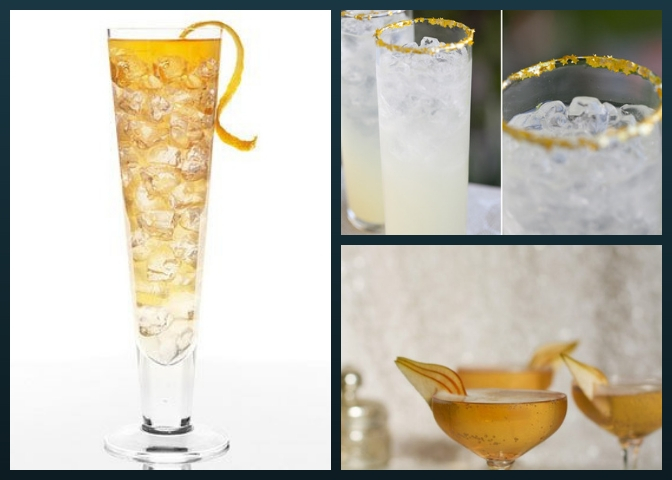
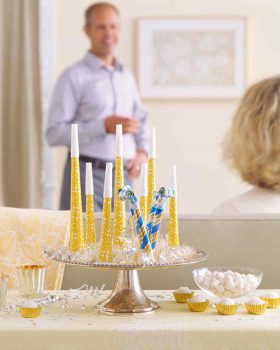
Bright Yellow Table Setting

Working with a golden yellow palette, the look was anchored with a table runner made with metallic glazed linen. The mix of old and new pieces of ceramic vintage dinnerware are all shades of creamy white, which makes for a unique tablescape.

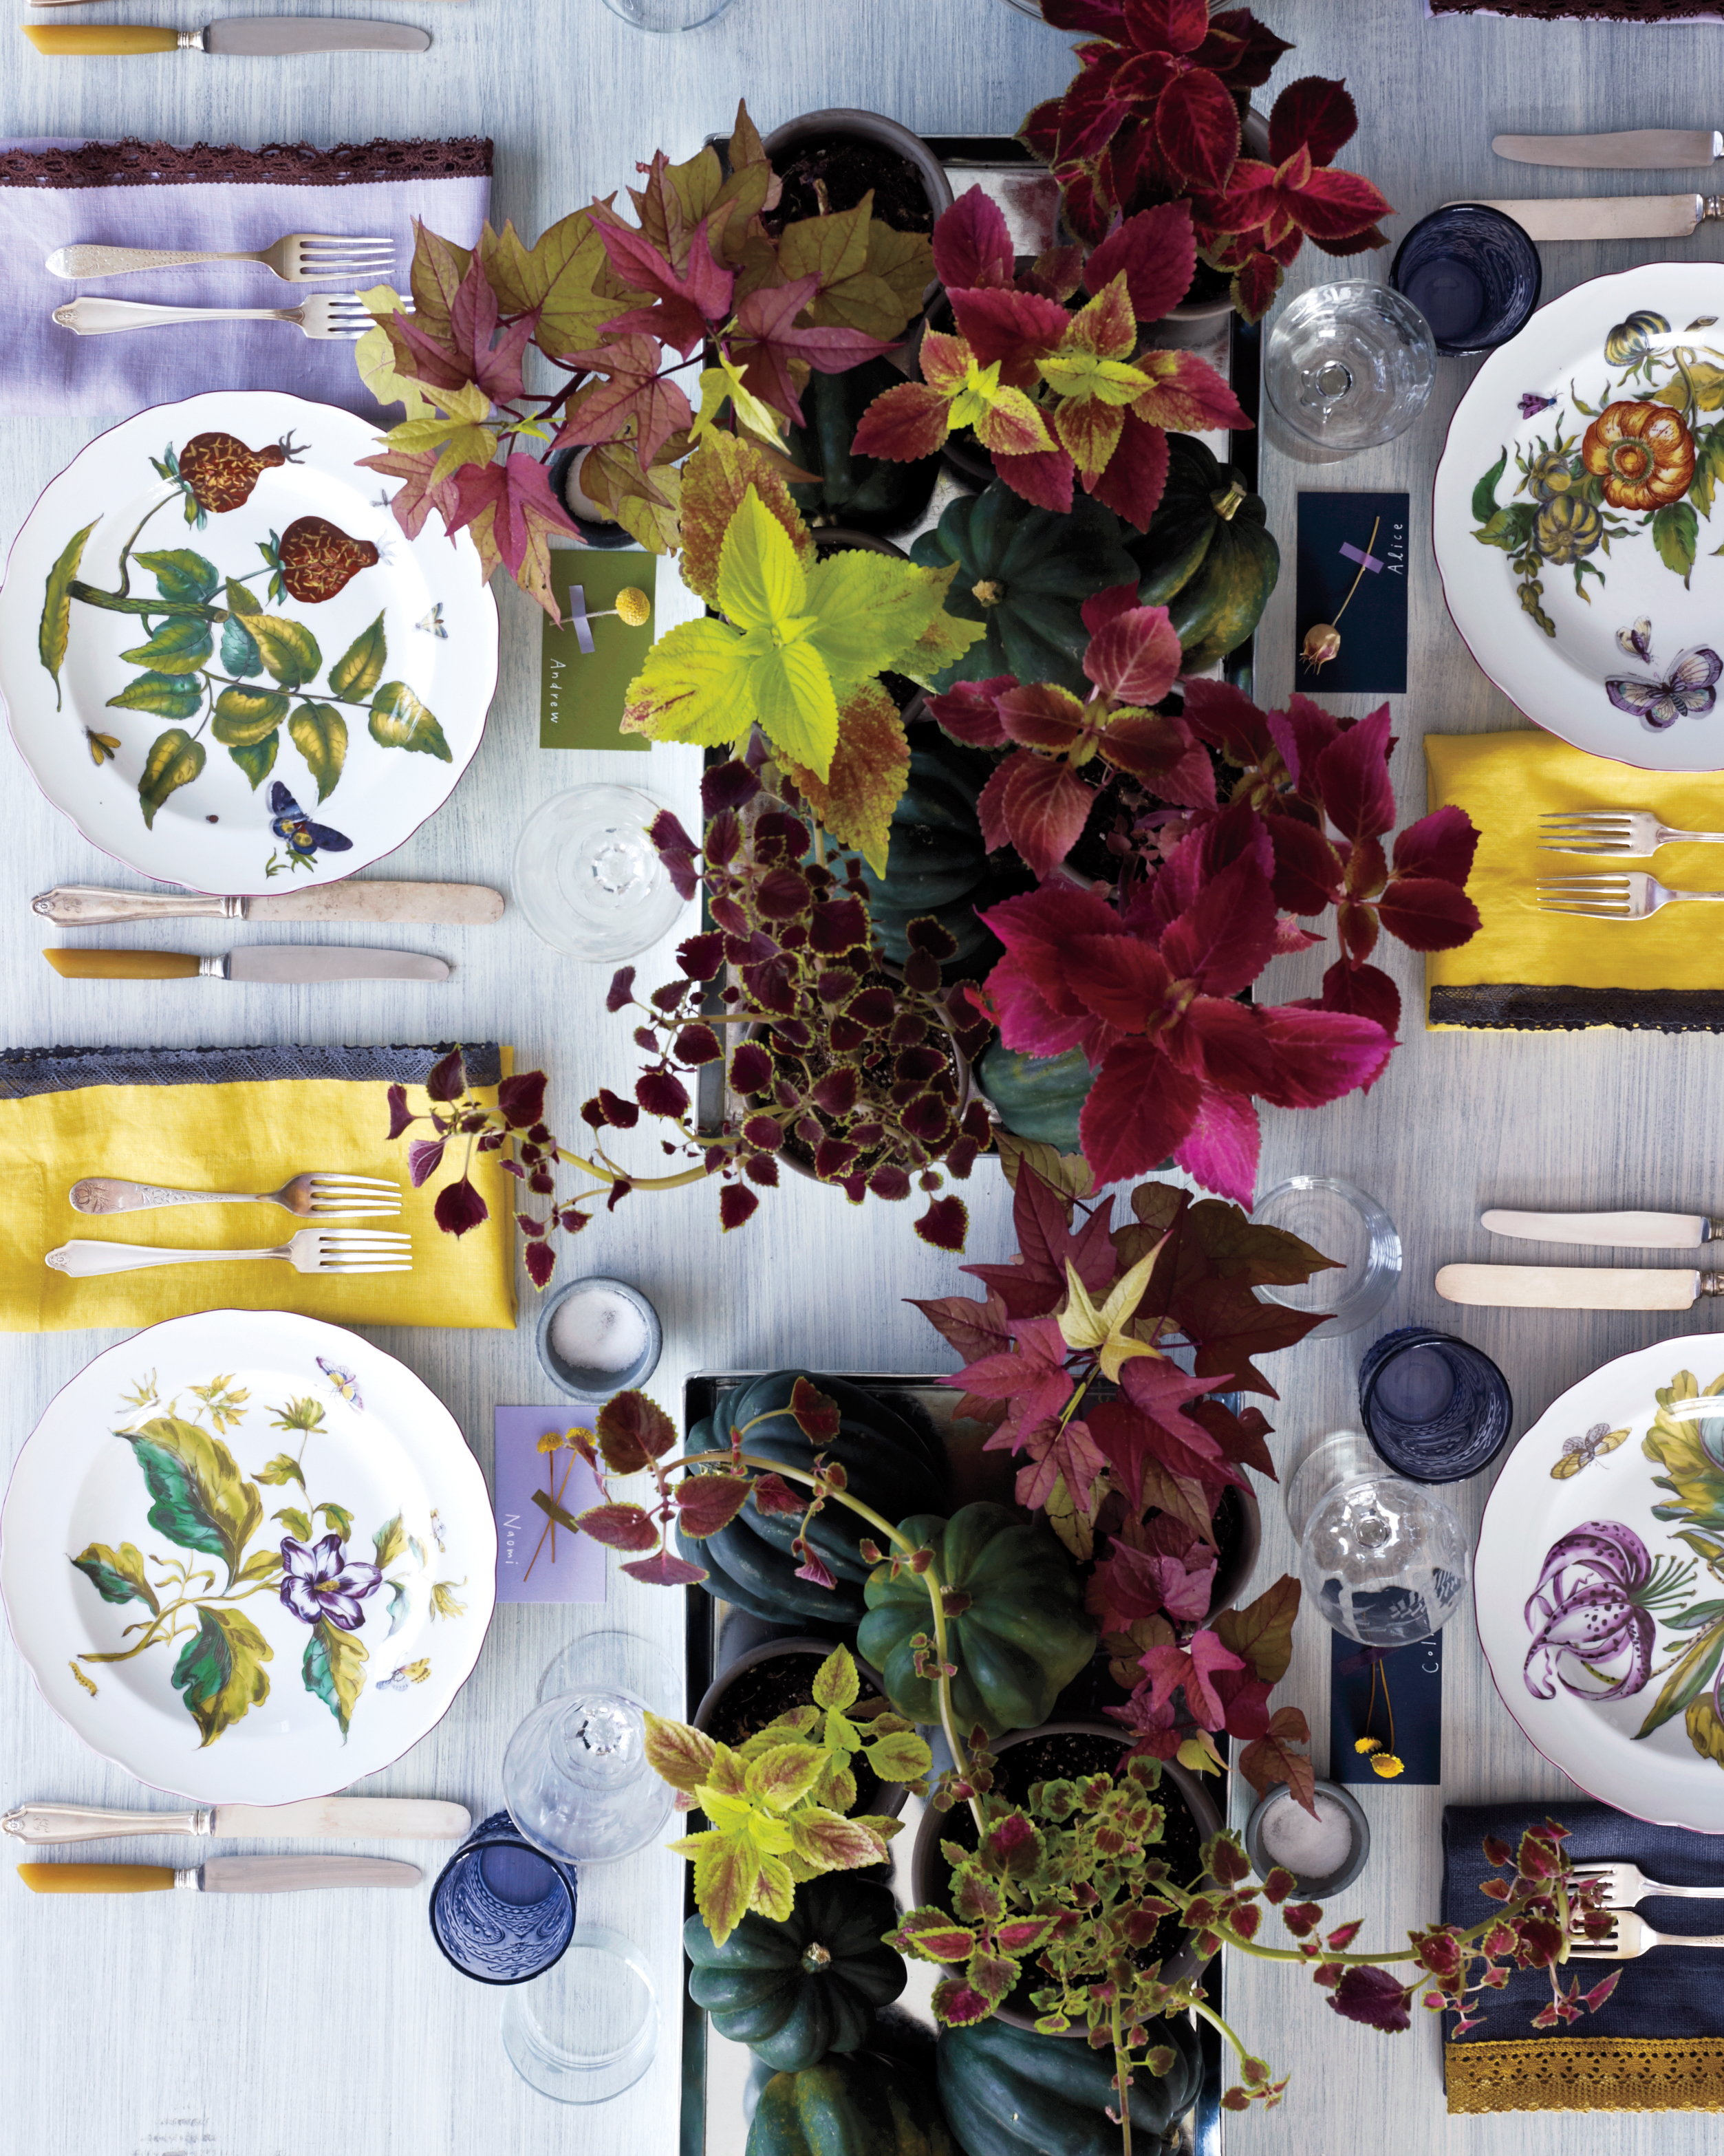
Pattern Play Table Setting

Botanical dinner plates were the starting point for this table. A fresh color palette pulled from the floral pattern—yellow, lavender, brown, and gray—ties everything together. Sleek gray side plates are a contemporary counterpoint to the vintage pattern on the dinner plates.

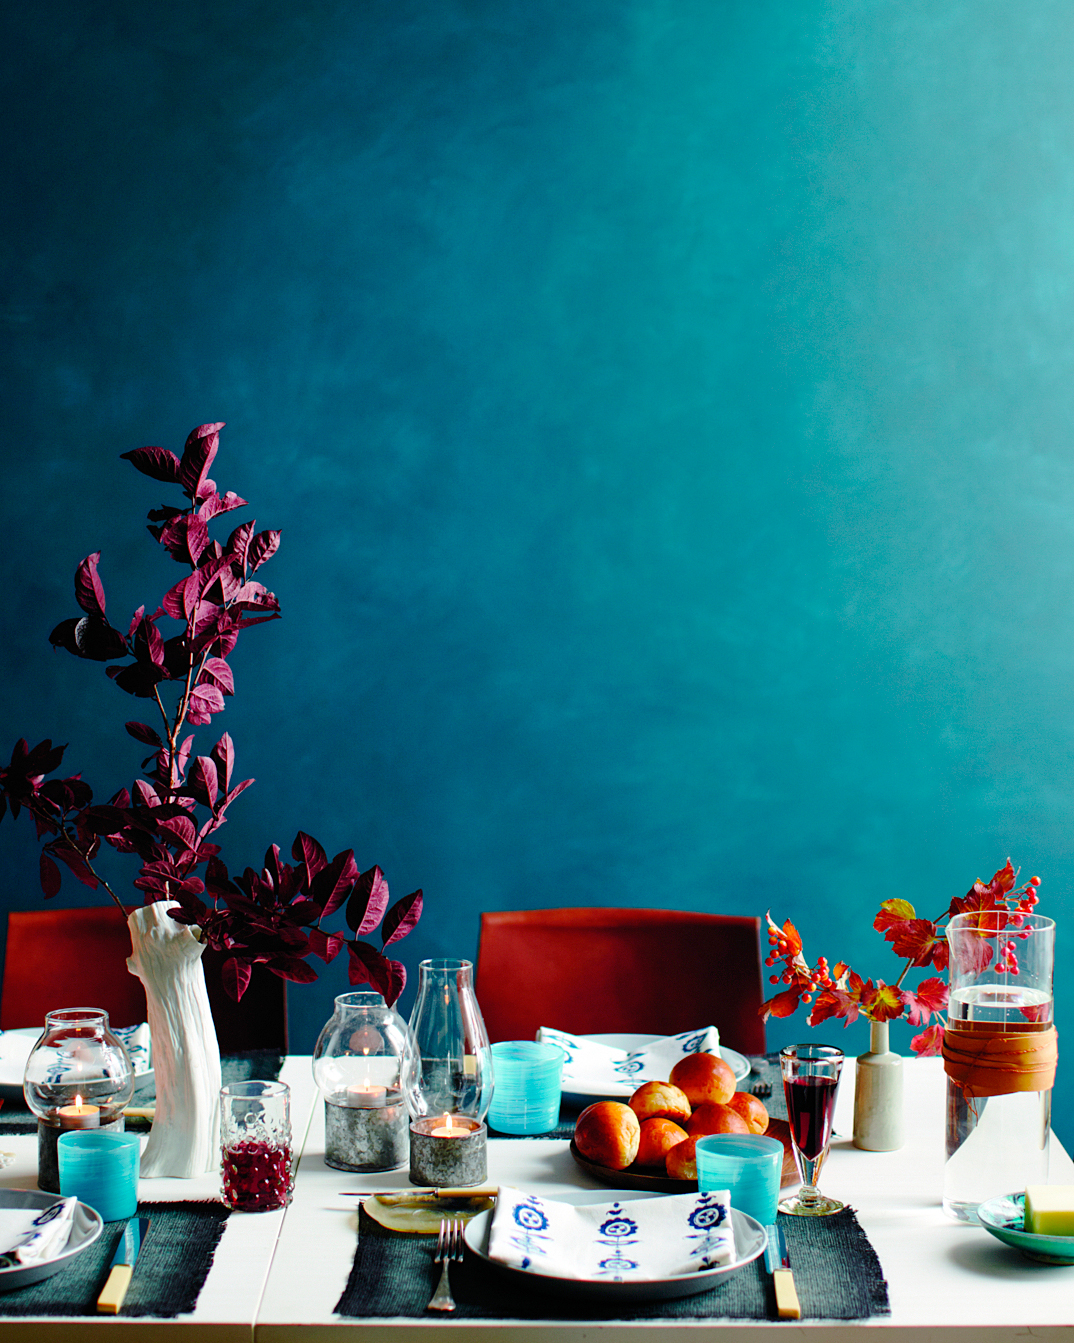
Richly Colored Table Setting

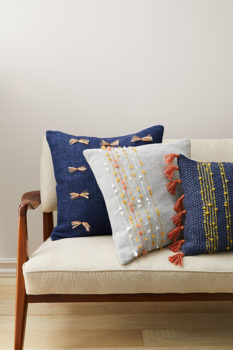
Sometimes, simplicity is key. This was the thematic vision from Deputy Creative Director Ayesha Patel on this Thanksgiving table, which incorporates natural materials and textures: burlap for place mats, a leather tie for the carafe, and block-printed napkins.


Home Tips: 10 Home Décor Crafts to Turn Your Home Into an Autumnal Oasis

Transforming your home into an autumnal oasis could be as simple as focusing on the small accents you’re bringing into each room of your home. When it comes to the changing of seasons, there is nothing more exciting than when summer fades into fall. The leaves are changing, the weather is cooling down, and your coffee order changes from iced to hot. Fall is a time to put your beach towels back in storage, and get back into regular routines. Thus, making it the ideal opportunity to return to your crafting room with these 10 Fall DIY crafts in mind.

1. Fabric Pumpkins

Fabric pumpkins are a fresh way to display seasonal gourds. You can pair sewn faux pumpkins among real ones (some of which you can spray or sponge paint) during this fall season. Imagine — spare branches, scattered leaves, and these pumpkins displayed in your home. Autumnal oasis dreams.

Home Décor Craft: Sew linen, silk, and velvet into adorable faux pumpkins that can be displayed and reused every year.

2. Wheat Cluster

For an easy, lightweight decoration that still evokes the glorious fall harvest, try these dried wheat bundles.

Home Décor Craft: Begin by bundling together three to ten stalks of wheat. Then, wrap the stalks of wheat together in twine. Leave about three feet of twine hanging off the bunch in a tail. Next, cut the stalks to approximately three-inches in length. Repeat for as many bundles as desired. Then, push the separate tails on the twines through a chosen bead, loop all at the end, and tie it into a knot. Hang it upside down on your front door as a creative way to say hello to the fall season!

3. Rustic Woven Lanterns

Thinking of dressing your dinner table with fresh center pieces this holiday season? Look no further with this eco-friendly and chic way to upgrade your dinner table.

Home Décor Craft: Upcycle old mesh placemats by cutting & rolling them into tubes and stitching them along the seams. Place cylinder shaped votives around candles. Wax, soy, or electric candles – your guests won’t be able to spy the difference! Candlelight will gracefully flicker through the loose weave of the hurricane lanterns as you entertain over dinner.

4. Soft Seats

With this DIY craft, dinner isn’t going to be the only warm thing at your table. With these simple slipcovers, you can instantly reinvent dining chairs at your formal dining table over the holidays.

Home Décor Craft: To start, simply drape a finished sheepskin over the back of the chair before securing it with Ultrasuede-tape or cord. Extra fall points for choosing a contrasting cord color. Next, finish securing them to the chair by threading the tie through the sheepskin on each side with a tapestry needle (that will help you create a cuff over the chair’s top). Knot the ends and let them hang loose. Voila!

5. Gingham Knit Blanket

Believe it or not, you don’t need to be an expert knitter to tackle this DIY project; you can make this cozy throw blanket with quick-to-knit strips.

Home Décor Craft: Gather scarves in the colors you want, and sew them together. That’s it! Below, scarves of alternating stripes are sewn together to create a unique gingham pattern.

6. Harvest Branches

We love how easy these fleeced branches are to put together. Specifically how they have the power to add a touch of warm color to any setting you place them in.

Home Décor Craft: Simply pull a bit of fleece roving off a ball, and then press the end of the fiber against the branch. Start wrapping tightly, gently pulling the fleece apart (without tearing it) as you go. Wrap the branches until the piece of fleece runs out. Add more fleece as needed to cover the branch. When adding, wrap over the last inch of wrapped fleece with e.

The friction of your fingers on the fibers and the natural oils form your skin help the fleece stay on the branch and adhere to itself.

7. Pumpkin Spice Scented Candles

If you’re among the camp that counts down the days until you can sip a classic pumpkin spice latte once again, these homemade candles are for you. Poured into orange-tinted mason jars, they throw off an especially autumnal glow in any area you might have in mind.

Home Décor Craft: Hot glue candle wick to bottom of festive colored jar. Bring water to a boil in a pot (filled half way). Reduce to a simmer. Place a different jar with broken up candle wax inside into the pot of simmering water. Water should be about 1/2 way up the side of the jar. When the wax becomes liquid add a heaping tablespoon of pumpkin pie spice. Mix. Carefully pour the liquid wax into the festive colored jar. If the candle wick starts to tilt, secure the wick between two sticks or pencils. Set aside to cool overnight. Trim the wick. Light it up!

8. Nut Wreath

Celebrate fall’s abundance of almonds, hazelnuts, pecans and walnuts with this festive decoration. Use any hard-shelled nuts, including acorns you gather from your own backyard.

Home Décor Craft: Gather all your nuts, small and large. Begin hot gluing the large ones together to form the shape of your wreath. Add in the small nuts as you go to fill in the spaces. Let cool, and hang on door. Ta da!

9. Embroidered Throw Pillows

Upgrade a pair of store-bought wide-weave cushions by tricking them out with bright neutral yarns sewn directly into the weave.

Home Décor Craft: Grab some of your favorite colored yarn and sew in fun patterns and fringe with a tapestry needle. That’s it. Truly. 

10. Block-Printed Linens

Block-printed linens are costly to buy, but surprisingly simple to make. With some textile paint, muslin fabric, and woodblock stamps, you can create linens that are exclusive and unique.

Home Décor Craft: Begin by layering a paper towel on top of a foam sheet; lay pre-washed muslin fabric on top, and smooth out any wrinkles. Then, pour your choice of textile paint on a plate. Next, dab a sponge in the paint and smooth it evenly onto a wooden printing block with a unique pattern. Stamp it on the muslin fabric. Let dry. Pictured are indigo shades, but you can substitue for any color of your choosing.

10 Spring Cleaning Tips for Your Home

Now that spring is officially here the time to tidy up around the home has also arrived. As cliche as it sounds to “Spring Clean” there is no better time to clean house and spruce up in and around your abode. That’s why we have rounded up 10 of the best tips to clean your home for the Spring Equinox!

 Bye, Bye Dust Bunnies!

  • Use a sticky lint roller to clean dirt and pet fur off the lower parts of drapes. For a deeper clean, take the drapes down, remove the hooks and run them through an air-fluff cycle in the dryer with a damp towel for 15 minutes. Rehang immediately after.
  • Dust blinds often with a microfiber cloth, swiping left to right and blade by blade from top to bottom on each window.
  • Spring is allergy season so dust end tables and shelves in your home thoroughly to keep allergies at bay.

The Rinse Cycle

  • Wash out trash cans. To really clean garbage cans, spray them thoroughly with a hose and then dump the water out. Afterwards use a disinfectant spray on the inside, then scrub the trash can with a handled brush and rinse it out again. Leave the trash can upside down to thoroughly dry.

Kitchen Kleanse

  • To clean glass, chrome or steel appliances, fill a spray bottle with a mixture of 50 percent rubbing alcohol and 50 percent water. Then use a dry cloth to polish and clean the surfaces to remove spots and fingerprints.
  • The refrigerator can become an unexpectedly cluttered place. Organize it once it’s had a thorough cleaning. Keep highly perishable food front and center and sort the longer-lasting ingredients and toppings by category.

 Scrubba-Dub the Tub

  • Maintain the tile surfaces of your bathroom, especially the shower by spraying the surface with generous amounts of cleaner. Allow the cleaner to sit while cleaning the rest of the bathroom, then go back to start scrubbing. If the grout is dirty with mold or mildew, make a paste of washing soda and peroxide to deep clean and disinfect.

Bedhead

  • On average we spend about 3,000 hours a year in our beds, almost the equivalent of four months to be exact! With that in mine, keeping our mattresses clean is as easy a flip of a coin. Rotate your mattress a few times a year and vacuum the surface. Afterwards sprinkle a mixture of baking soda and a few drops of essential oil. Let the mixture sit for a couple hours then vacuum the mixture away.

Office Space

  • Spend the day getting your files organized and space decluttered. Aside from going through papers on your desk, you should also take the time to back-up files on external or cloud devices so they’re secured. Have a lot of documents to toss? Make sure to shred anything personal before throwing it in the bin!

Outside and over Yonder

  • Cleaning your outdoor furniture is incredibly simple, but easily forgotten. While the rain can wash away some dirt and pollen, a thorough wipe down with a mild detergent goes a long way. Make sure to check your furnitures manufacture guidelines if a special care routine is required.


10 Simple Curb Appeal Secrets

Boost your home’s curb appeal without draining your wallet. These simple, budget-friendly fixes—like adding a wreath, painting the front door, or tending to the landscape—will make your home look like a million bucks.

Refresh a Planter

Pay attention to your planters. Add character and interest to your home by planting flowers in salvaged or repurposed containers, like barrels, birdbaths, and wheelbarrows. Look for inspiration in items you already own and at flea markets.

Have a Seat

Seating can add major curb appeal without much cash. Look for something simple and eye-catching, like a pair of chairs found on Craigslist or a repurposed wooden bench. Add color with cushions and bright pillows—just be sure to use durable, weather-resistant fabrics.

Lantern Light


Flea market finds—like these majestic lanterns—add rustic beauty at little cost. Keep your eyes open at thrift stores, flea markets, and garage sales for statement pieces that can flank a front porch.

Add a Wreath

Wreaths aren’t just for the holidays. Dress up your front door year-round with wreaths in a variety of fun textures and designs. Snag decor at a discount by planning ahead and buying items well in advance. Fall wreaths, for example, go on sale in November and December, so buy at a reduced price, then store until September rolls around.

Keep It Bright

Make a statement with a colorful front door. A fresh coat of paint can work wonders on any surface, and a bright hue ensures that your home will stand out in a sea of neutral colors. Simple materials you likely already have on hand—paint, primer, and brushes—keep costs low.

Light It Up

Warm lights and lanterns give off a homey vibe without much effort. You likely already have some sort of porch lighting, but consider adding a spotlight on a favorite tree or lanterns along a walkway.

Simple Symmetry

Symmetry is pleasing to the eye, but it can be difficult to obtain in home design—especially if your home wasn’t built with balance in mind. Capture the effect without a remodel by creating a symmetrical front porch or walkway. Matching potted plants flanking a set of stairs or identical rocking chairs on each side of your front door will do the trick.

Build Character

High-end curb appeal lets your home stand out—in a good way. The key is to play to your home’s strengths and architecture. If you’re on a budget, pick one feature to home in on—like shrubbery, lighting, or the front door—and make it the focal point of your exterior.

Courtesy of: Better Homes & Gardens

4 Ways to Compost

With spring not too far off, it is the perfect time to start some new at-home routines. With California leading the way in green initiatives, we’ve rounded up four simple composting tricks. These techniques will help you reduce waste and aide the environment. The bonus is with these DIY tips you don’t even need a yard to get started!

Composting is a great way to not only reduce how much you’re throwing in the garbage, but it can also keep your trash smell at bay, thanks to having less organic material in that bin. Not to mention how much your plants will love it; if you don’t have a full garden, your houseplants will be happy about it, too. Even city dwellers or anyone without a yard can do it—really!

Before you get started, think about the type of composting you want to do. Cold composting is easier: You simply take organic materials you’d normally throw away —coffee grounds, eggshells, fruit, and vegetable peels—and put them in a composting pile or bin (just don’t add meats, dairy, or fats). Over about a year, the materials will decompose. Hot composting is more complicated, and uses nitrogen and carbon-containing ingredients to speed up the process. Another option is vermicomposting, which is when you use special worms to help the process along.

Don’t let the fact that you don’t have much space hold you back from composting. With a little ingenuity, a proper compost bin can be created just about anywhere.

1. Make your own outdoor compost bin. 

If you’ve got a spare trash can and a drill, you can turn that can into a composting can. You can also build your ownwith welded wire mesh, concrete blocks, or wooden pallets, and you can hide basically any bin behind a simple lattice fence. If you’ve got an outdoor bin, you can also throw in dry leaves, wood bark chips, and grass and plant clippings while you’re taking care of your yard. Make sure to water and stir your pile thoroughly.

2. Make your own indoor compost bin. 

Much like how you hide your trash can in a pull-out cabinet or under your sink, you can hide a compost bin right in your own kitchen, too. Again, you’ll need a drill: Use it to drill holes in the bottom of a metal container with a lid, then place the container into a shallow tray with sides. Give this indoor bin a base layer of a little dirt, and top your food scraps with some damp shredded newspapers (the newspapers will help control smell!). Make sure to stir it every week or so, and keep it covered.

3. Make a worm bin system. 

If you’re composting indoors and still worried about odors, vermicomposting is a great idea. You can’t just use any worms—you’ll need to purchase redworms online or at a garden supplier (about one pound per square foot in your bin). A vermicompost bin should also be kept in a cool, dark place. Start with a base of shredded newspaper or leaves mixed with soil, and get it damp, then add your worms and your food scraps. Vermicomposting is also a great option for beginners—if things get messed up, just dump out your bin outside and start over.

4. Check for community composting. 

If you aren’t into making your own compost, or don’t have the space for it, check to see if your community has its own group composting area where you can drop off food waste. Your city hall might have details, or you can ask your neighbors or post your query on a community directory, like Nextdoor. Your community may even provide biodegradable bags to hold your scraps in between your visits to their composting center.

Your compost is ready when it’s not giving off any heat, and it’s become dry, brown, and crumbly. Use it to feed your garden or potted plants, and watch your plants live their best lives!

Courtesy of: Better Homes & Gardens

All-Natural Easy Home Cleaning Tips

If there is one thing we pride ourselves on in LA, it is clean and natural home living. Rather then perusing the household products of your local Whole Foods, we’ve listed below 10 easy ways to use Vinegar as your go-to cleaner.

As an all-natural, all-in-one cleaner, white vinegar really does work wonders in terms of making your home look spic and span. In the kitchen, it cleans out your coffeemaker, removes hard water stains on your glassware, and rinses down your waste bins. In the laundry room, it keeps your colors bright and your whites whitened. Have a pest problem? You won’t for long with the help of white vinegar. It works as a repellent against ants in places where they like to crawl and hide (think: your patio, porch, or picnic table). Pick it up once, and it will become your new go-to cleanser.

-Martha Stewart

Deodorize the Room

Unpleasant odors lurk in the carpets, rugs, and upholstery. To remove these musty smells, fill a dish with half an inch of white vinegar and leave it out in the room until the smell dissipates.

Click here for the step-by step

Dissolve Rust

To clean sharp edges on a dirty knife or pair of shears without cutting yourself, pour white vinegar over the blade. Then sprinkle with coarse salt and rub with a cork. Rinse with water and wipe dry to prevent rusting.

Keep Colors Bright

If you think that the colors of your clothing may run in the wash, try this time-honored treatment: Pre-rinse laundry in a solution of distilled white vinegar and cold water, using 2/3 cup vinegar for each gallon of water. Let the garments soak for up to 15 minutes, then wash and dry according to the manufacturer’s instructions.

Click here for a step-by-step

Clean the Faucet

Cut through the crusty buildup of mineral deposits on your faucet with this trick: Soak a paper towel in full-strength white vinegar, then drape over the buildup. Leave for about an hour, then scrub scum away.

Wash Your Windows and Mirrors

Reflective surfaces such as these should have a streak-free shine. You can make your own cleaner by mixing one part vinegar and one part water.

Sanitize Your Garbage Disposal

It’s no surprise that a trash bin can harbor the worst odors in your home. But a rinse-down doesn’t always do the trick. After rinsing with fresh water, use a long-handled brush to scrub the inside with a mixture of white vinegar and warm water. Rinse once more and let dry.

Remove Hard-Water Stains

Use a clean rag to rub each piece with distilled white vinegar. This will remove the hard water’s calcium and magnesium buildup. (And don’t worry—the items won’t smell like vinegar once dried.)

Clean Bath Toys

Wash bacteria and mildew from bath toys by giving them a bath of their own: Fill a bucket or large bowl with warm water, adding 1/2 cup white vinegar per gallon of water. Soak toys for 10 minutes, then rub gently with a sponge and allow to dry. The acetic acid in vinegar cuts through dirt buildup and works as a natural disinfectant.

Save Your Shoes

Leather and suede are some of the hardest materials to maintain. Stains can easily result when our shoes come in contact with rain or salt. To rid your shoes of unsightly salt spots, rub them down with a paper towel dampened with white vinegar, which dissolves the salt.

Shine the Silver

Silver is easily scratched and tarnished. Restore its sparkle by gently buffing your pieces with vinegar and a soft cotton cloth. Finish by rinsing and drying your silver with the cloth.

Courtesy of: Martha Stewart Home Living

Your Award-Winning Golden Globes Party Guide

If you are like the rest of us, awards season means one thing…watch parties! Unless you happen to be invited to one of these star-studded events, then lucky you. If you don’t happen to be so lucky to snag an invite, our guide below will surely make you an award winning host. So grab your left over NYE confetti and a bounty of Jiffy-Pop for your Golden Globes watch party 2019!!

Food

A few great suggestions are Chicken Meatballs with Cumin and OrangeGolden Rosemary Garlic Mixed Nuts, and Moroccan Shrimp with Pomegranate Sauce. For an easy treat, try dipping the tops of donuts in a simple icing, and then adding gold sugar or sparkles. Use store-bought glazed donuts (easy!), mix together some confectioners’ sugar and milk to make a thin glaze (also easy), and dip the tops of the donuts in the glaze then into gold sprinkles.

Cocktails

If you’re looking for some signature drinks to spice up the evening, look no further than the Golden Night Cocktail from Salt & Wind or a Sparkling Golden Globes Cocktail. Or if you don’t want to mix up a cocktail, a little champagne, sparkling wine or cider is just as chic in a golden sparkled rimmed glass.

Red Carpet

The entrance sets the tone for the entire party, so why not wow your guests and welcome them in style? You can never steer wrong with a red carpet. If you don’t have an actual red carpet, you can use a roll of red paper, fabric, or a long red plastic tablecloth. You can even go a more simple route and just decorate your entrance with gold stars and helium balloons.

Photo Booth

The paparazzi may not be hanging out around your house, but if you give your guests a selfie stick, you can pretend like they are. If you still have gold or silver Christmas wrapping paper and New Years photo booth props laying around the house, then you’re halfway to the finish line on this one. Put the wrapping paper on the wall and set out the props and selfie stick. It’s as simple as that. Trust me, your guests will have no problem taking it from there.

Print out our Golden Globes ballot below for even more party fun for you and your guest!!


Courtesy of: TaraTeaspoon.com

Your DIY NYE home decor guide!

Celebrate the New Year in style! If you perfect soiree is the one you plan to have at home we have the guide for you. Read below for a stylish round-up of DIY home decor to ring in 2019!!

Hanging Bubbly Ball Decoration

These festive ornaments are reminiscent of Champagne bubbles rising to the top of a glass — perfect for a New Year’s Eve bash.

Click here for more details.


Shimmering New Year’s Streamers

Don’t toss those scraps of leftover holiday paper! Use them to make these glamorous streamers, inspired by the Times Square ball.

Click here for more details.


A brightly hued citrus centerpiece, piled high with velvet leaves and silver balls, brings sophisticated cheer to an evening of Champagne toasts.

Click here for more details.


Courtesy of: Martha Stewart Living